Advent Calendar
by Jensa
(Toronto, ON, Canada)
Step 1
Step 3
Step 4
Step 7
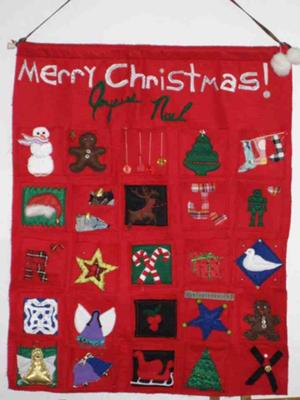
This advent calendar is not meant to be a Martha Stewart piece of Christmas perfection but rather a heartfelt heirloom made by yourself and kids.
It will create memories that will be triggered every December you hang it up. The pockets are big enough to stuff small inexpensive or home made toys in them and large enough for regular sized candy canes and other Christmas treats.
Have fun!
Materials...
- Felt (one large piece for back, smaller pieces in a variety of colors)
- Any extra material you have around the house with a Christmas feel (plaid, red, green, gold. white)
- Beads, Buttons. Ribbon, Small bell(s)
- Any small festive decorations for the pockets (use your imagination)
- Thread: White, Red...
- Large stick or wood dowel ; I used a curtain rod!
- Long piece of ribbon or rope to tie on each end of stick and hang calendar
- Stuffing (if you want to stuff some of the pockets)
Step 1.
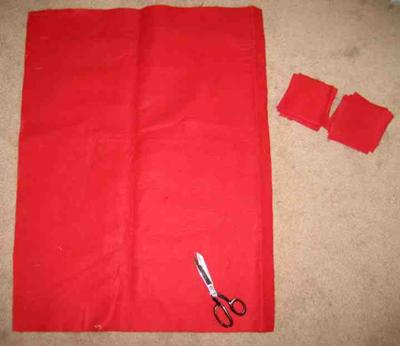
Cut Large piece of felt as base.
Keep in mind you will have to fit 24 squares (pockets) on to base
Allow 4" for dowel/ stick at top and space for 'Merry Christmas' lettering
I used:
-36" x 27" Base
- 4"x 4" squares for pockets (Twenty-four)
This allowed for 1" in between pockets and an extra 1" for any miscalculations
Step 2.
Fold top 2" over and sew to back
This will allow stick to fit through when finished.
Step 3.
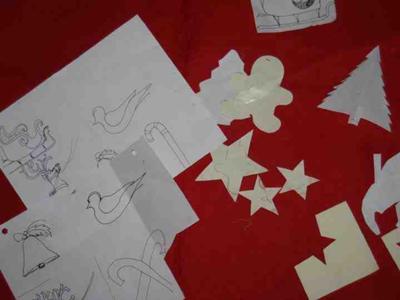
- Make stencils of Christmas symbols (Dove, Wreath, X-mas Tree, Gingerbread man, Snow man etc..)
I used cookie cutters for some and traced some from illustrations in kids Christmas story books.
- After tracing the stencil on paper, cut it out (make sure they will fit on your 4"x4" pockets)
- Pin stencil to fabric chosen and cut out.
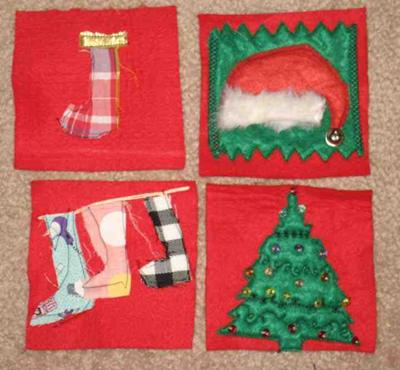
- Pin to pocket and hand sew or machine sew.
Step 4
-Add detail to the pockets!
-There are a lot to decorate so get the kids to do some too.
No need for perfection- the kids pockets will create memories of when they were young.
- Choose decorative beads, ribbon etc...
- This part is what makes each pocket special so take your time and enjoy.
Step 5
- Cut out felt lettering or buy fabric lettering
-Sew on to top area of base
I used different stitches for each letter (we just happen to have a machine with a huge number of
stitches to choose from).
I spelled out 'Merry Christmas' and 'Joyeuse Noel' underneath in cursive.
Step 6
- Arrange finished pockets onto base piece of felt and pin in place so that all fit evenly.
- The last 'pocket space' does not need an actual pocket as its Christmas day; its up to you...
I made an 'X' with black felt and sewed a skull button on center, adding a Santa hat made from
felt.
- Stitch them on to base. You may need to remove some of the bigger beads or anything in your
line of fire in order to sew pocket on- you can re-stitch them afterward.
Step 7
-Put stick into loop made at top of calendar
- Tie a piece of strong ribbon onto each end for hanging
VOILA!
Now all you have to do is fill the 24 pockets...LOL

