Bucks Bag
by Krissy Schenck
(Fishers IN)

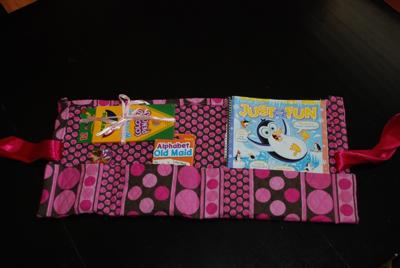
Final Project Open

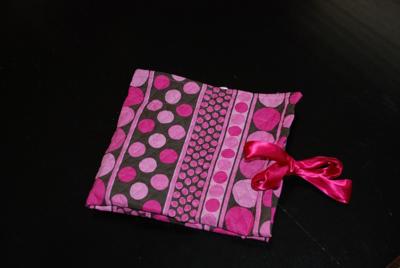
Final Project Closed
I made this so my children would have a bag of entertainment while I enjoyed my morning mocha at Starbucks. The beauty of it is that it can be simplified for younger students and blinged-out for older students. It can also be tailored to meet the desire of each child. My girls are between 4 and 7, so we made a simplified version.
1. Select what items the child would like to bring to the coffee shop and lay them on a long piece of material so you can see how much you will need. I chose a double sided quilting fabric so one side has a different print than the other and it is thicker than plain fabric.
Allow for a double folded quarter inch stitch around the entire material and then cut to the size of your needs. Lay the items out toward the top of the material to allow for space to fold up the pocket from the bottom. Stitch the top and bottom seams.
2. Select a ribbon for the tie. I made mine with a thick ribbon that was folded. I then put my child's choices on the mat and then folded the bottom portion up to form a pocket. I pinned this so I could measure the middle from this point so I could see where to sew each side of the ribbon to the project.
Stitch the ribbons so they flare outward from the project. Double fold the side seams about a quarter of an inch and stitch the left and right seams.
3. Fold the project in half like a book to mark the middle with a pin. Open it back up and then lay the items out again on top of it. I folded the pocket back up from top to bottom and made sure there was enough room for each item. Stitch the sides of the project so that the one large pocket is coming up from top to bottom.
4. Lay out your items again and mark where you want your pockets. (Old Maid, Granola Bar and Magazine/Paper holder in demo.) Stitch from top to bottom to make your individual pockets as needed.
5. Lay your top item on your project. (Pencils in the demo.) Place pins at the end of the box, in the middle of top, bottom and sides. Remove the item and lay a ribbon from left to right and from top to bottom, with ends long enough to tie the bows. Repeat with the top to bottom. Only sew between the pins for this step, allowing the ends to be used for ties.
Note: For the savvy sewers, the corners of your layout might require you to change the needle. My girls and I are not that savvy, so we hand stitched the thick corners where it all came together and was a bit thick.
My three daughters all carry different things, from markers, to IPOD Touch, to books, to UNO. Design your pockets and project size to what your child needs.
Related
Kids Lessons Projects:
~Kids Sew Lessons, ~Applique Shirt Project, ~Bath Mitt, ~Binder Cover,~Christmas
Cone Ornaments,~Cloth Basket,~Cloth Basket Tray with Ribbon Corners,
~Cloth
Dinner Napkins or Bread Cloths,~Easy
Sew Curtains,~Fairy Costume,
~Headbands,~Jean Skirt,~Pillowcase
Skirt,
~Prairie Points,~Sew Purse, ~Recycle
Your Old Tie Projects,~Reversible HeadBands, ~Shirt
into Shorts Project,~Shirt
and Transform it into a Dress,~Tie Pillow, ~Tie Skirt,~Tiered T-shirt Skirt, ~Wall Hanging,
~Shorts,
how to sew, ~Entertainment
Bag


