Frayed Edge Quilt
by Elliana Reickard
(Eldridge, IA USA)

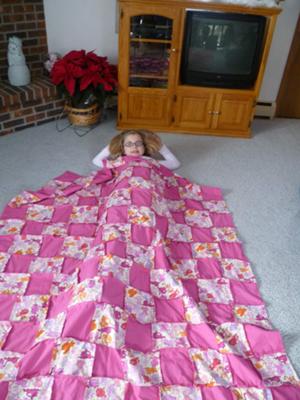
Elliana & her quilt
Decide how big you want your quilt. Then cut out 6-1/2-inch squares. If you don't want the fabric to fray, you can cut out using pinking shears.
You can buy material (I used a contrasting fabric every other square)or just use scraps of material or denim. Place 2 cotton squares together, wrong sides together, and repeat for a total of four fabric layers. (I used my contrasting fabric for the bottom layer).
Right sides will be positioned together to construct the backing. Stitch a 1/2-inch seam allowance along one edge for each square. Be sure & back stitch at beginning & end of each edge. Stitching the four layers together along one edge creates two blocks simultaneously.
Unfold the blocks & position the seam on top. Chain stitch squares together. Assemble the number of squares you want for your quilt width together to complete a row. (My twin quilt had 17 rows of 11 squares in each row.) Sew the rows together positioning the seams in opposite directions (butting together).
After sewing all the rows together, sew a 1/2-inch seam allowance around the outside edge. If you did not use pinking shears & want your quilt to fray, then clip all the raw edge seams 3/8- to 1/2-inch apart. Wash & dry the quilt to fray the edges.
Related
Lessons Projects:
~Sewing
Lessons Level 5, ~ Mini
Snap Bag , ~Sew
a buttonhole, ~Zipper
Bag, ~Netbook
Carrier,~How
to sew a quilt,
~Denim
Quilt, ~Rainbow
patch blanket, ~Striped
Quilt, ~Frayed
Edge Quilt, ~Bandanna
Quilt, ~Scrap
Patchwork Quilt, ~How
to tie a quilt, ~Sew a
Rug, ~Needle Book
Comments for Frayed Edge Quilt
|
||
|
||
Sewing Materials Available


